Way back in 2013 I wrote a post on the earlier generation of this blog after visiting the Grand Designs exhibition in Birmingham in October of that year.
I was working closely with a high performance window manufacturer at the time and this was the first show they had exhibited at.
The seeds for my own ‘Grand Design’ were planted at that event, as the last section of that old post illustrates.
Back then I was imagining a high quality garden building that incorporated features such as spa facilities, skylights, bi-fold doors and green roofing.
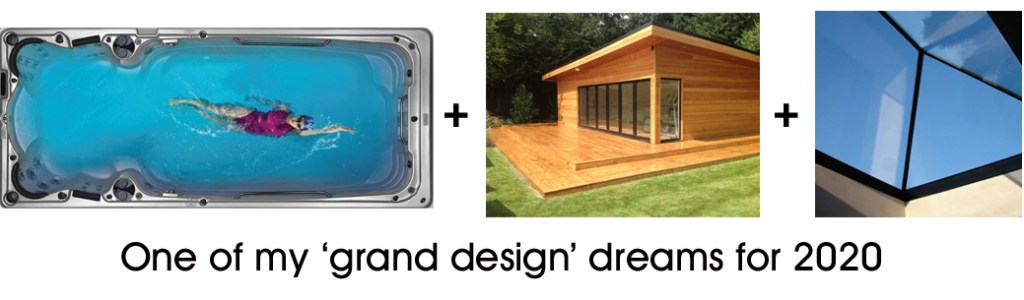
The bottom line is I have always wanted to design and build something from scratch that incorporated the majority of key building techniques and requirements. However, I’ve never really wanted to take on a whole house project.
So when the family suggested that it was time to replace the old log cabin that I had kept adding to over the years I decided the time was right to bring my ‘Grand Design’ to fruition.
As I am of an age where sadly my older relatives are dying off with increasing frequency, I have inherited a lot of tools in recent years.
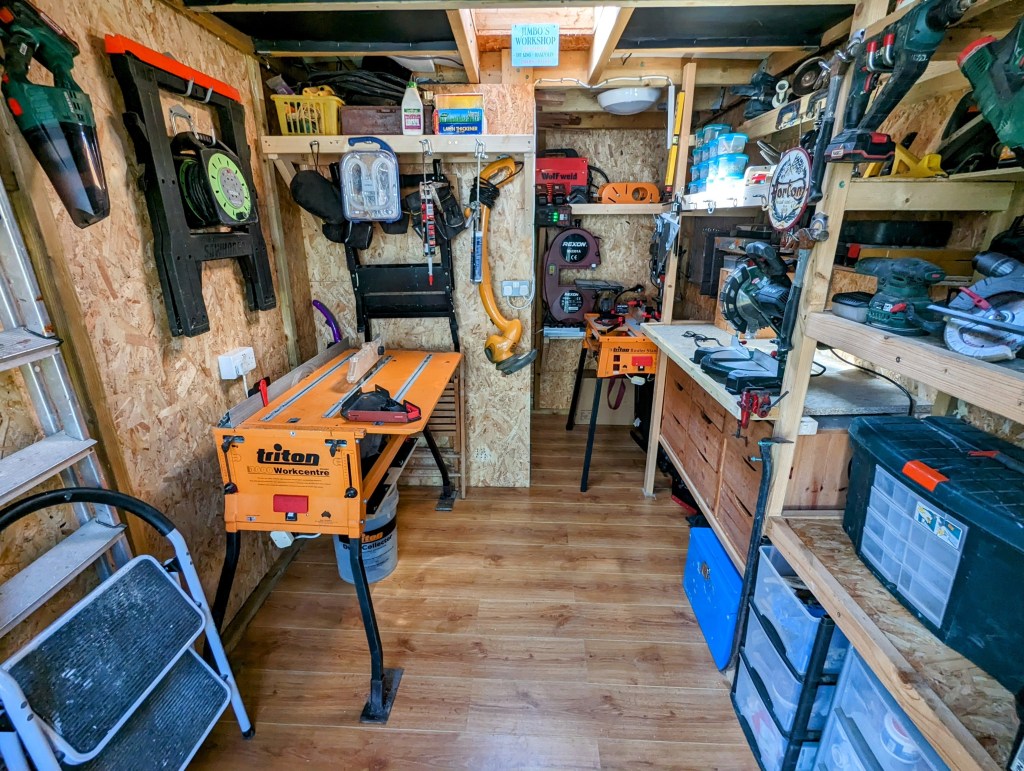
In his latter years my dear departed Dad loved buying ever more sophisticated workshop tools but often never got around to using them. So, in the first instance I wanted a space where I could do these tools some justice.
The low roofline of the shed I added to the original log cabin made it entirely impractical as a workshop and, after being used mainly as additional storage for my wife’s online business and then the place I was restoring an old motorcycle, the main part of the log cabin had no room for the big workshop tools.
Given I have plans for redeveloping other aspects of the house going forward I need a practical space for using these tools.
Parts of the main house have accommodated various items of gym equipment over the years but it’s never been ideal using those spaces for exercise so creating a comfortable place to house and use that equipment was definitely a second priority.
Add those two requirements together and you are looking at a reasonably sized building to meet the needs effectively. By my initial calculations I was looking at a space at least 6 metres wide by 4 metres deep.
The issue then becomes how do you fit something of that size into a modest garden space without it becoming overwhelming?
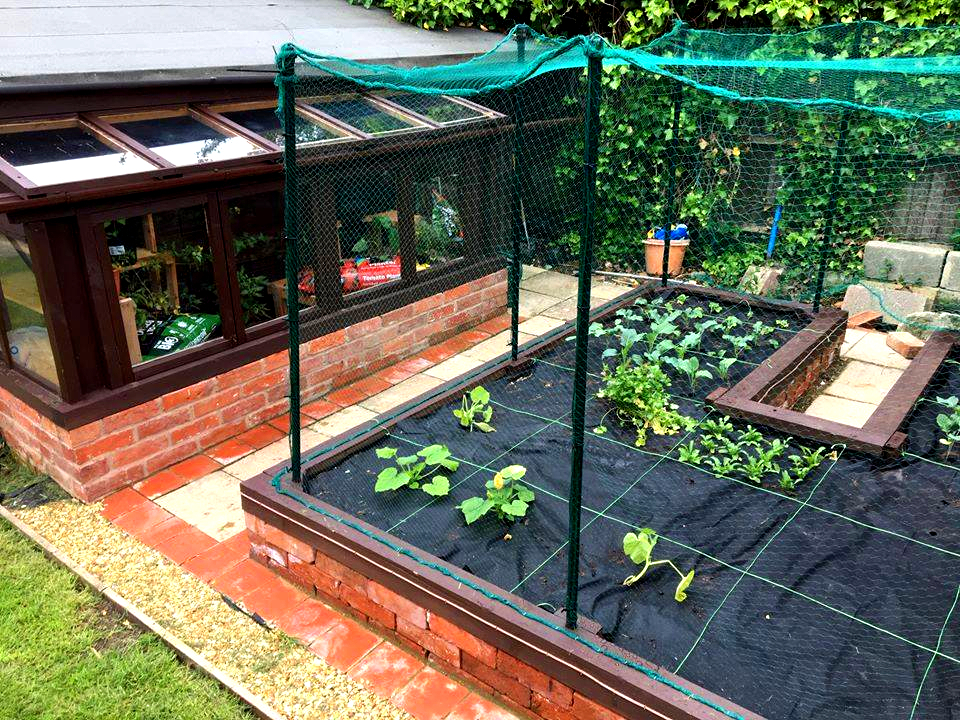
Given that I had increasingly expanded the original log cabin with a shed and greenhouse extension and then an adjacent raised vegetable patch, we were used to the bottom half of the garden being filled up so I resolved to stay within the boundary of those original developments.
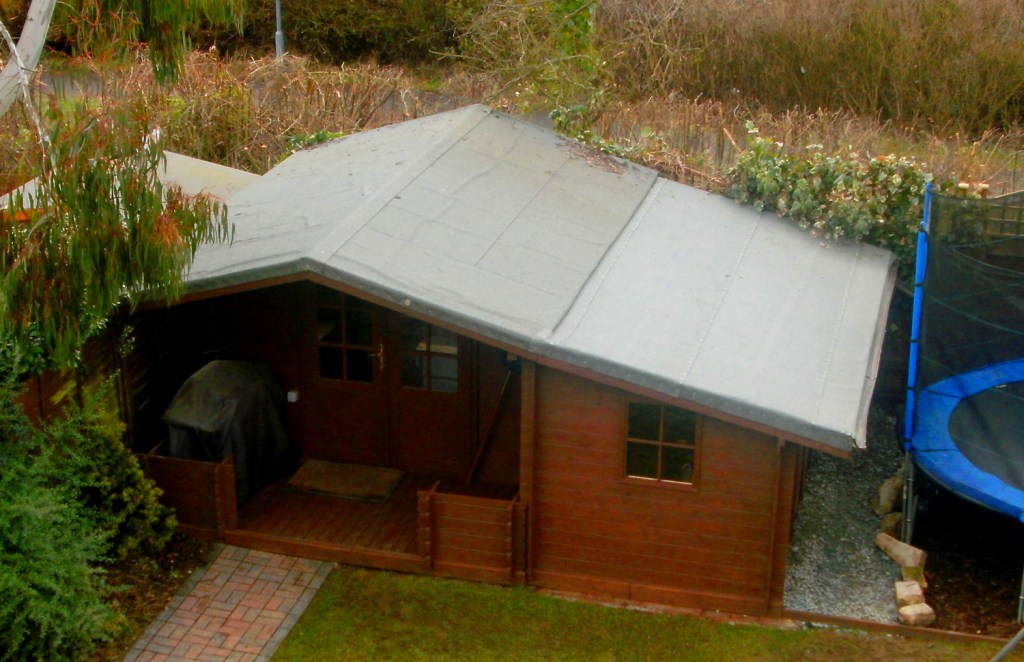
As the prevailing weather is from the West I figured that I would change the arrangement of the original building and have the open area to the left so it was sheltered by the main structure.
To continue the Grand Designs theme of this post, one of the companies presenter Kevin McCloud is a brand ambassador for is Green Retreats and their website gives very clear pricing guidance on what a certain size and specification of garden building could cost.
A structure that is 4 metres deep and 6 metres wide with their more basic specification comes in at around £35,000
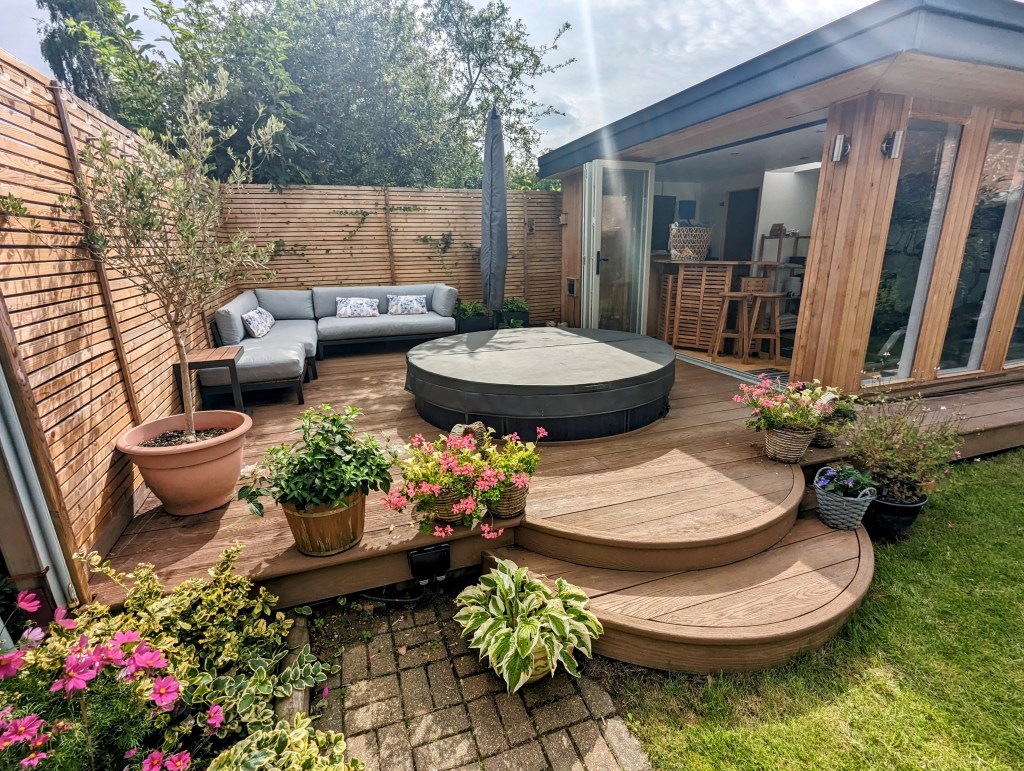
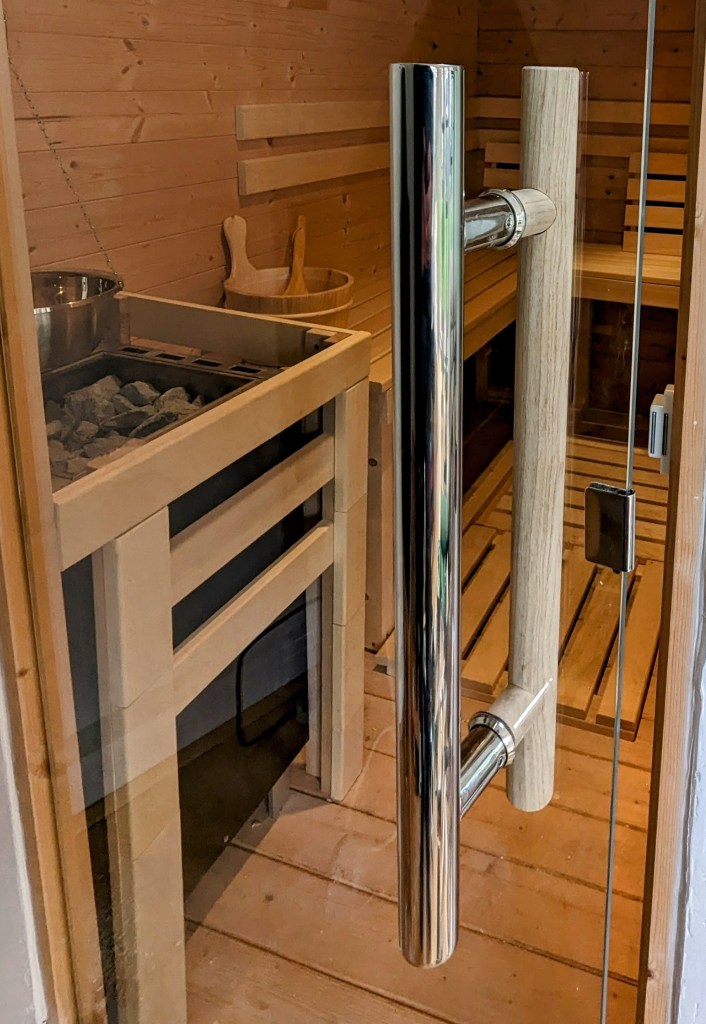
My challenge was to spend considerably less than this for a building with a much higher specification that also included a hot tub, large composite deck area with curved steps and a fully equipped sauna.
I established a budget of £30,000 for the complete project and despite the cost of building supplies sky-rocketing over the last couple of years we have completed everything for around £32,000 – still within the typical cost of just buying a garden building.
When you look closer at the Green Retreats type buildings, the structures are pretty lightweight, with minimal foundations, thin walls and roof structures not designed to take any weight.
In contrast, my design has a structure suitable for supporting the ‘green roof’ approach I wish to add in the future. It has substantial concrete and block foundations and much higher specification insulation in the floors, walls and roof.
Also, because I sourced the doors second hand they are a much higher specification than would typically be supplied with a garden building. All in all it has made for a surprisingly well insulated structure that retains heat well and doesn’t get too hot when the sun comes out.
One way of reducing costs was to not waste money on cladding materials that wouldn’t be seen. As the right hand and back wall of the building are screened by fencing there seemed no point in putting cladding on them.
I decided the cheapest approach was to use the OSB panels I was installing elsewhere in the structure and then soak them with preservative and use a bitumen barn paint to give them a 100% waterproof coating.
Because l intended to put a green roof on top the structure needed to be robust enough to take the weight. The potential weight of a green roof combined with the extra weight of the structure to support it meant I needed a solid foundation.
I opted to build strip foundations about 30cm deep but strengthening the concrete with glass fibre to be absolutely sure of a strong, solid base. I then built walls two blocks high to take the floor beams.
The biggest challenge of this project was managing the logistics of building a new structure while gradually removing the old structures.
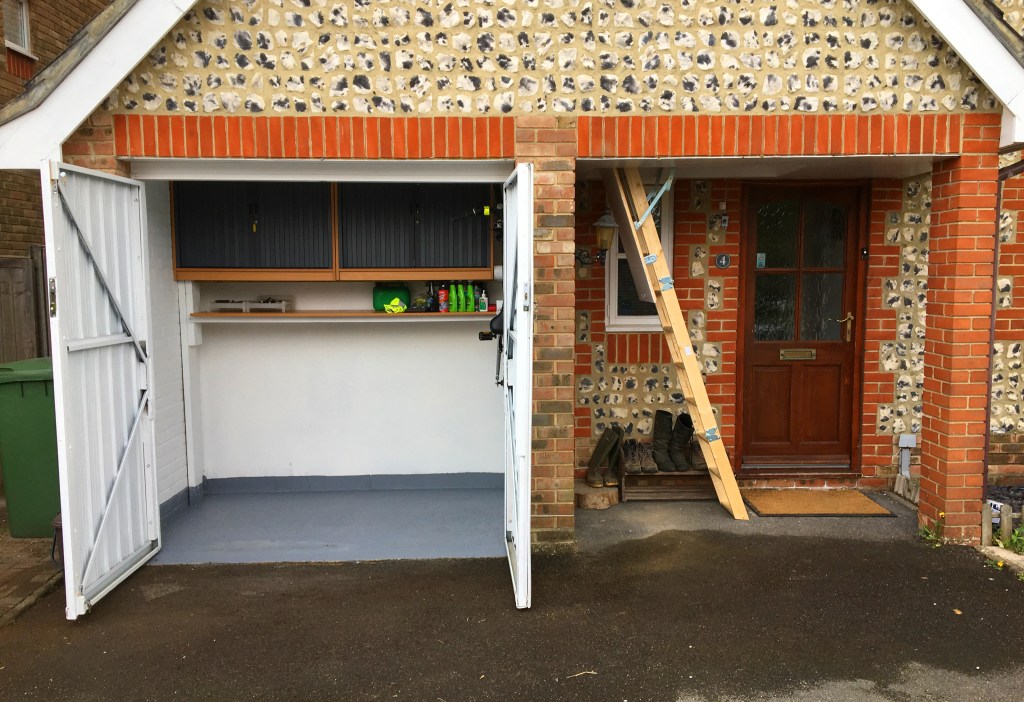
Prior to starting construction at the back of the property I had redeveloped the garage space at the front to incorporate my almost completed motorcycle project and also create an accessible loft space to provide more storage for items originally housed in the old log cabin and shed.
By working right to left across the back I was able to build the weather proof shell of what would become my new workshop so that I could gradually empty the shed and log cabin spaces ready for removal.
During the course of the project I took regular photos from the same position in my third floor loft room that I subsequently turned into a timelapse of the build process.
You can see clearly how I pre-built the side and rear wall sections and then used these to anchor the roof beams.
A very tangible example of the impact of the pandemic and subsequently the war in Ukraine on building material prices was the main item I used for the walls and the roof, namely sheets of OSB.
The original plan was to get bulk material deliveries from Travis Perkins via a friend’s trade account but pandemic driven supply chain issues meant the builder’s merchants were struggling to get basic materials, including bags of cement and, crucially, OSB.
Recognising the growing issues I began to stockpile items and looking for alternatives.
I noticed that a budget hardware store was closing one of its locations and bought up all of their structural timber at a knocked down price, significantly cheaper than the trade prices of the merchants.
I also spotted that my local B&Q was selling 18mm tongued and groved OSB flooring in 2.4 metre lengths at discounted prices. When I added in further 20% off from discount cards courtesy of a neighbour who works for the company I was getting these boards for around £6 each.
When you consider that at the peak of inflated building material prices last year these boards were selling at around £24 each and are now around £18 per board then that was a massive saving and I am pleased I kept stocking up my car from floor to roof with these boards until I had exhausted all storage space around the house.
Anyway, as a picture speaks a thousand words, here are a few of my favourites of the finished result …